Time Value Setting
In my last posts we have discussed the aperture triangle and basic camera settings, starting with aperture control.
Recap
There are 3 main aspects that control the exposure of your photographs:
- The size of the aperture (aperture)
- The time the aperture is open for (shutter speed)
- The sensitivity of the sensor (ISO)
We considered the semiautomatic modes on your camera that set one of these 3 values (Canon terminology):
- Aperture Value (Av) fixes the aperture size, mainly so the photographer can vary the depth of field in the image.
- Time Value (Tv) is the subject of this posting (may be S (shutter) (value) on other camera makes.
Time Value/Shutter Value
 |
| Birds in flight - high shutter speed essential |
There are 2 reasons why a photographer might wish to fix the shutter speed:
- To control camera shake and ensure a sharp image
- To handle a moving subject:
- To freeze a moving subject, e.g. bird in flight
- To capture movement blur to show movement in your photograph.
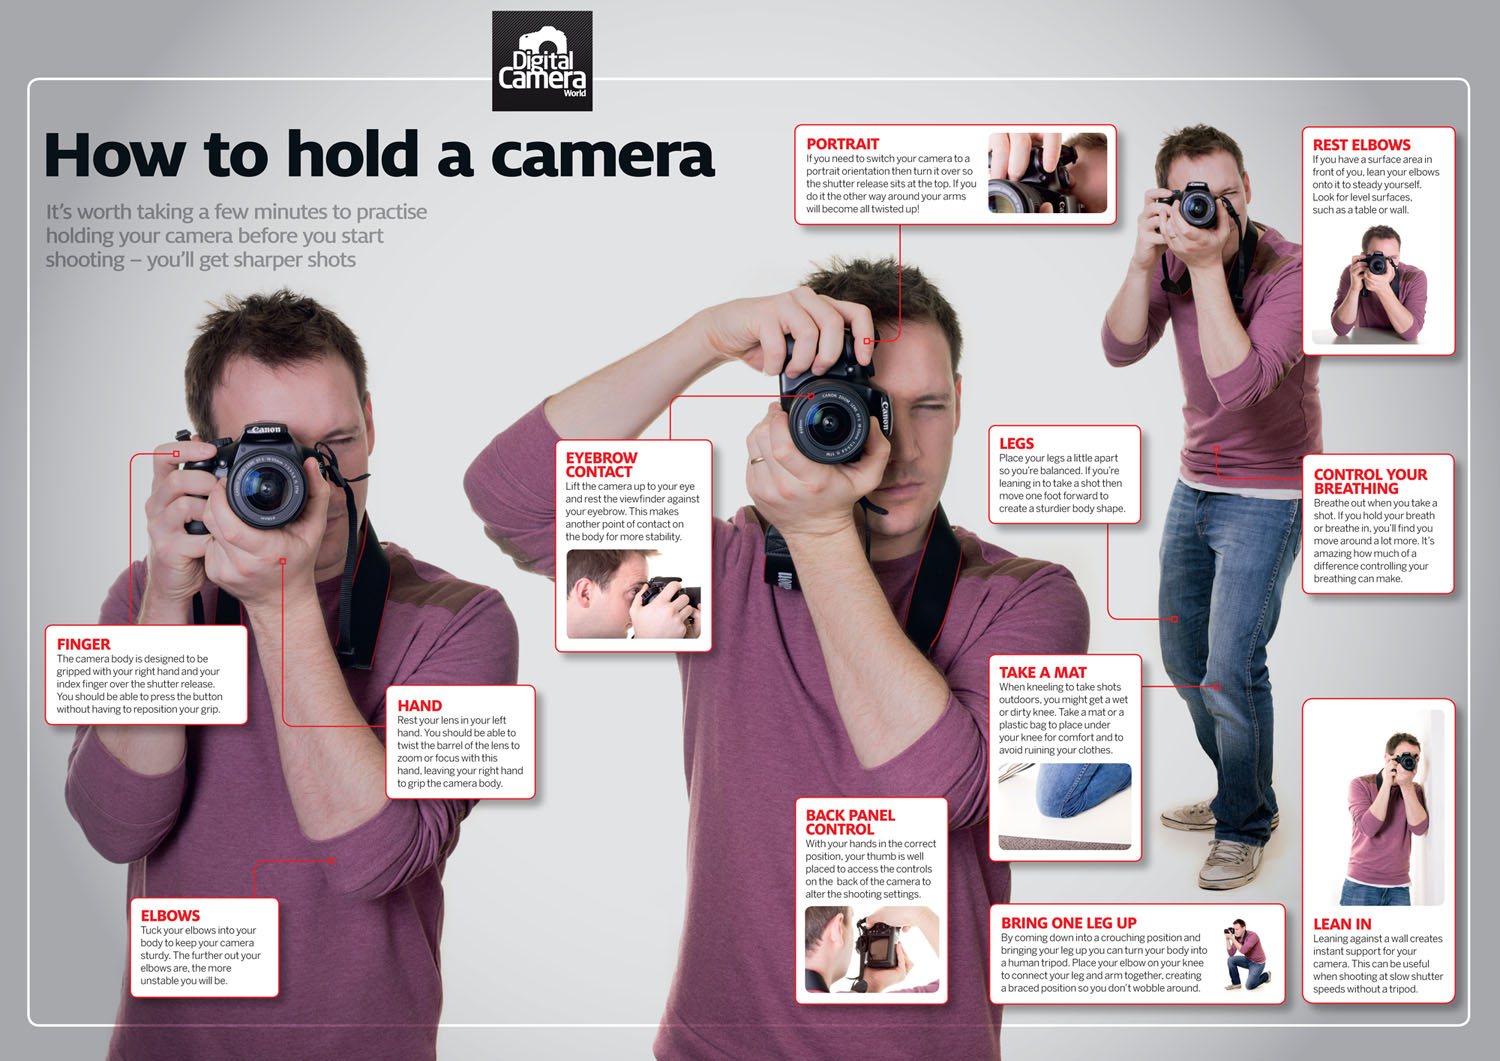
Controlling Camera Shake
Controlling camera shake is a matter of:
- how you hold the camera,
- the length of the exposure, and
- the focal length of your lens
Move away from this firm stance, using a screen on the back of the camera, for example, and the minimum speed you can handhold will fall down, perhaps by one or 2 stops. So, considering our 50mm lens, the longest exposure reduces down to 1/25 or even 1/13. This means you have to set:
- a large aperture, and/or
- high ISO
The fully automatic modes on our cameras assume the camera is being handheld so are biased towards high shutter speed/large aperture, making creative low depth of field images very difficult.
Modern cameras/lenses have image stabilisation that can improve the situation by 1, 2 or even 3 stops meaning you can "stretch" the exposure time a little.
Increasing the focal length of our lens makes things harder:
The image of geese in flight above was taken with a 400mm lens, towards the end of the day; there was not much light. The maximum shutter speed to handhold the camera is 1/400th of a second. My camera had 1 to 2 stops of image stabilisation but the large lens made it difficult to hold steady and track moving objects.
Camera Shake Summary
- Avoid electronic displays on the back of your camera when handholding.
The electronic viewfinder forces you to hold your camera out at arms length, a very unstable position!
But not all cameras (cf mobile phones/tablets) have digital viewfinders you can place to your eye.
- Keep a tight grip, control your breathing
- Lean on something, rest your camera on something
- Stay below 1/focal length if at all possible.
Motion Blur
Freezing the Action
Let's first assume we want to avoid motion blur, and we want to freeze the action. Our minimum shutter speed is determined by the speed at which our subject is moving.
A bird in flight is probably flying at around 20 to 30 miles per hour (increasing up to 50/60 mph for a bird of prey diving). At, say, 40 km per hour our bird is moving 11 meters per second, or 20 cm in 1/50th of a second. So you can see we need to get to very small fractions of a second to freeze the action of a sedate bird in flight.
As a guide to freeze different types of action:
 |
| Example shutter speeds to capture different moving objects |
Showing Motion Blur
Looking through my photos for something to illustrate this style of photograph I realised I have very little that displays deliberate blur. An area that needs more practice.
 |
| 1/80th sec at f14, ISO 100 |
In this (heavily cropped) example of a deer running across the field in front of me I panned the camera to follow the deer while taking the photograph. I wanted to capture a sharp deer against a blurred background in order to display movement.
Technically it is a success the deer is reasonably sharp and the background is blurred (but not visually interesting enough) but there is little to support the composition.
If you look closely you will see the legs are blurred because they are moving faster than the body.
Looking at the settings for this photo I realise I did not have time to set the camera as I would have wished. I just grabbed the camera and started shooting.
- It was taken in aperture priority, small aperture, f14 for a good depth of field
- The ISO was fixed at 100, for best quality
- The shutter speed 1/80th second is what I would have wanted for a panning shot (slower than the minimum but not by too much as I wanted
Comments
Post a Comment